Connect an ABP application with OpenIddict to Zapier - Part 3
@admin 8/4/2022 6:58:41 PM
Introduction
This article builds on the foundation established in Part 1 of the series to show you how you can extend the functionality of your system with Zapier so you don't have to build and maintain a separate API code base for each interaction. Specifically, this will show a real-world scenario where you extend the functionality of the CMSKit pro commercial module to automatically share newly created blog posts to various social media.
This will be a 3 part series covering different aspects of this process for clarity:
- Part 1) Connecting your ABP app to Zapier
- Part 2) Creating a Zap from the ABP API
- Part 3) ABP Commercial CMSKit Social Automation
The third part of the series will not be contained within the source code and will focus primarily on the Zapier side, but it is an interesting use case for the setup (and my original motivation for figuring this out) so I thought I would include it.
Source Code
The source code for the ABP application utilized during this article can be found on Github
Requirements
The code for this project requires the following: - ABP Framework 6.0.0-rc.1 (for latest available OpenIddict features) - MongoDb - Visual Studio (other IDEs will work, but this article has some Visual Studio specific stuff that you will need to adapt to any other IDE)
Additionally, in order for Zapier to work correctly it will need to be able to access the API. Generally this means that you need to have a publicly routed domain name.
If you need help, here is a really good article I found that helps walk you through setting up your development environment with a custom domain: <https://dotnetplaybook.com/custom-local-domain-using-https-kestrel-asp-net-core/>
You will also need an SSL certificate. Here are a few good resources for getting free LetsEncrypt certificates for domains you own for your personal projects:
If you are still struggling with allowing public access to your development environment, let me know if the comments and I will throw together a more comprehensive tutorial on how to get it done.
Development
To begin this article, we are assuming you have followed through on Parts 1 and 2 and established a working connection with your API. I’ve adapted the integration that we created in those parts to work with my production instance at byteology.co so we can see it with live data. It is worth noting that if you used the ABP Suite to generate your site and have a front and back end, you will want to point the API endpoints to your back-end URL.
So, navigate to the zapier developer platform and let’s begin.
Create the “GetBlogs” trigger
First step is to create a trigger to get the existing blogs from the site so that you can target the Zaps that you create to a specific blog.
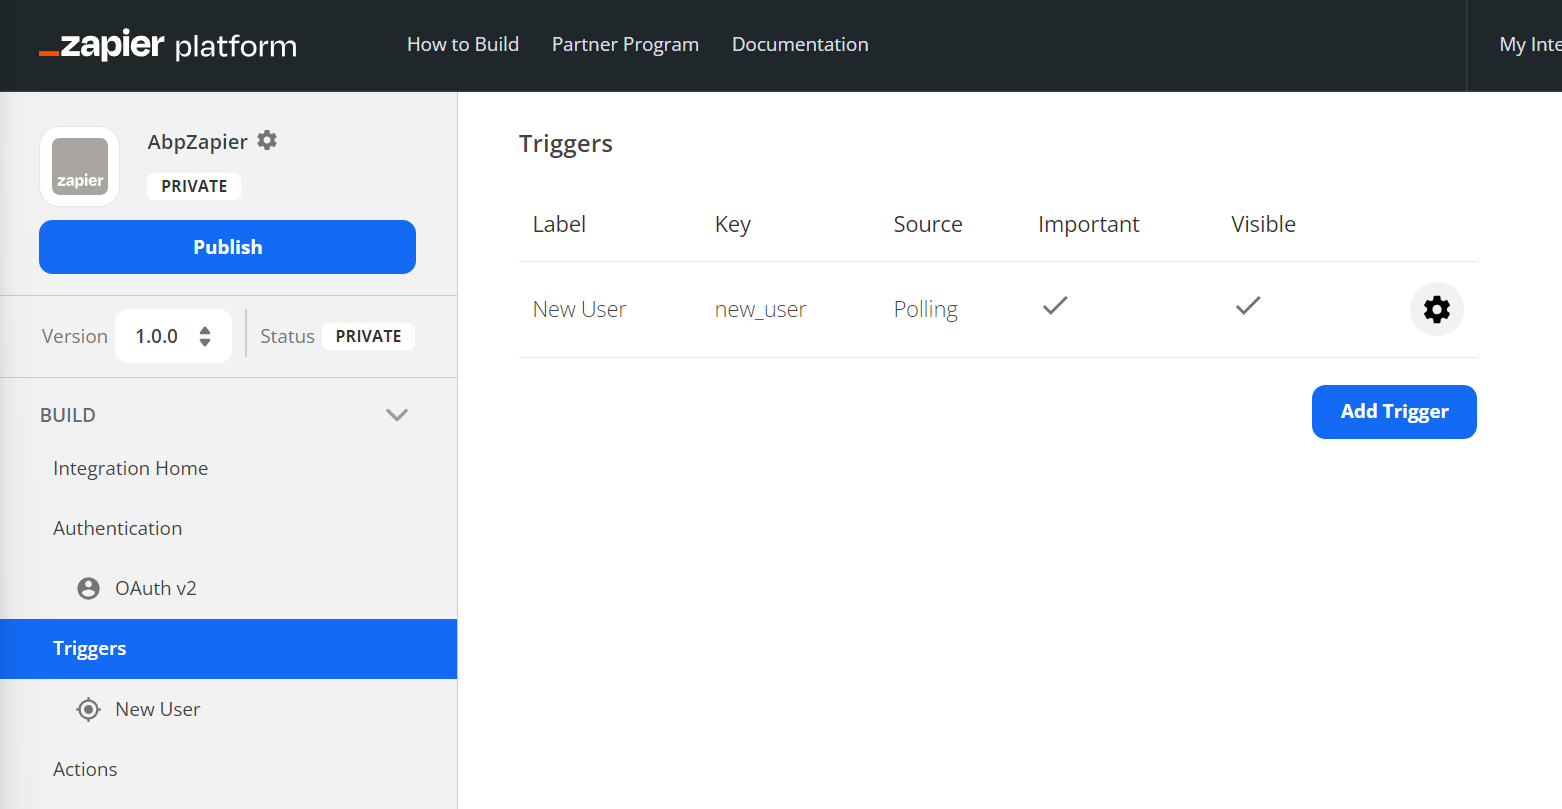
Navigate to the “Triggers” section and click on the “Add Trigger” button.
Settings
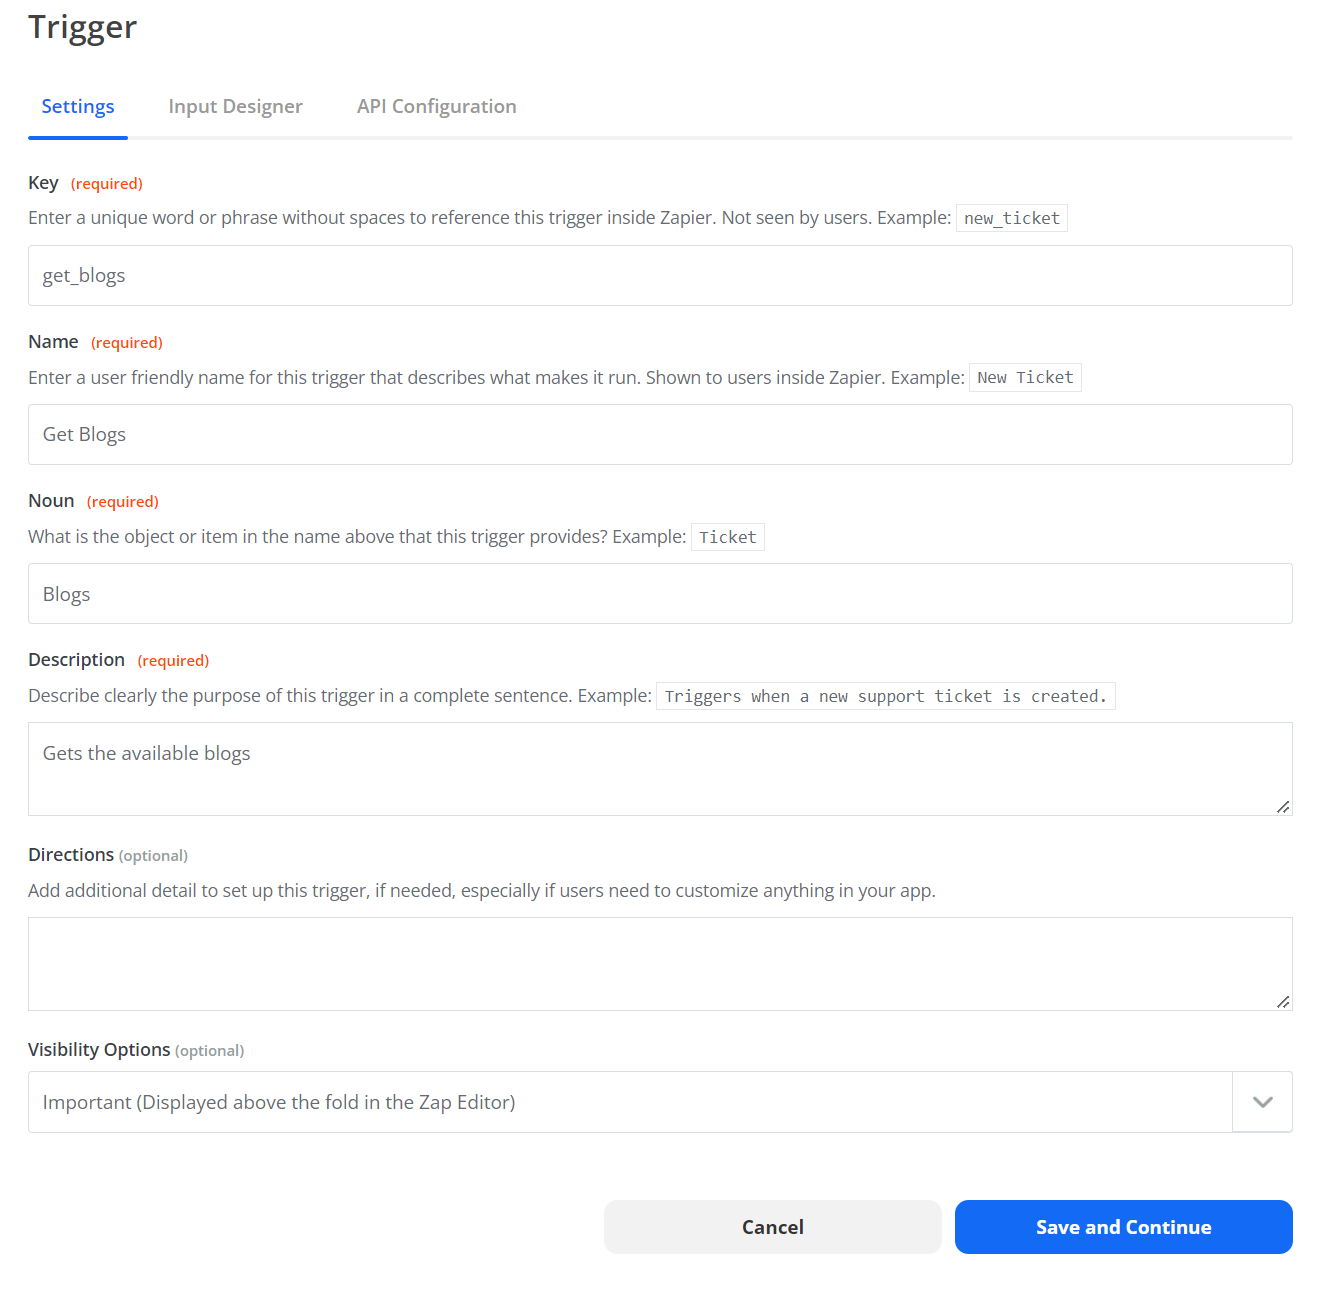
Fill out the form in the standard format, then press the “Save and Continue” button to advance. Here I used the following configuration
- Key: get_blogs
- Name: Get Blogs
- Noun: Blogs
- Description: “Gets the available blogs”
Input Designer
Leave the input designer blank on this one and move onto the “API Configuration” tab.
API Configuration
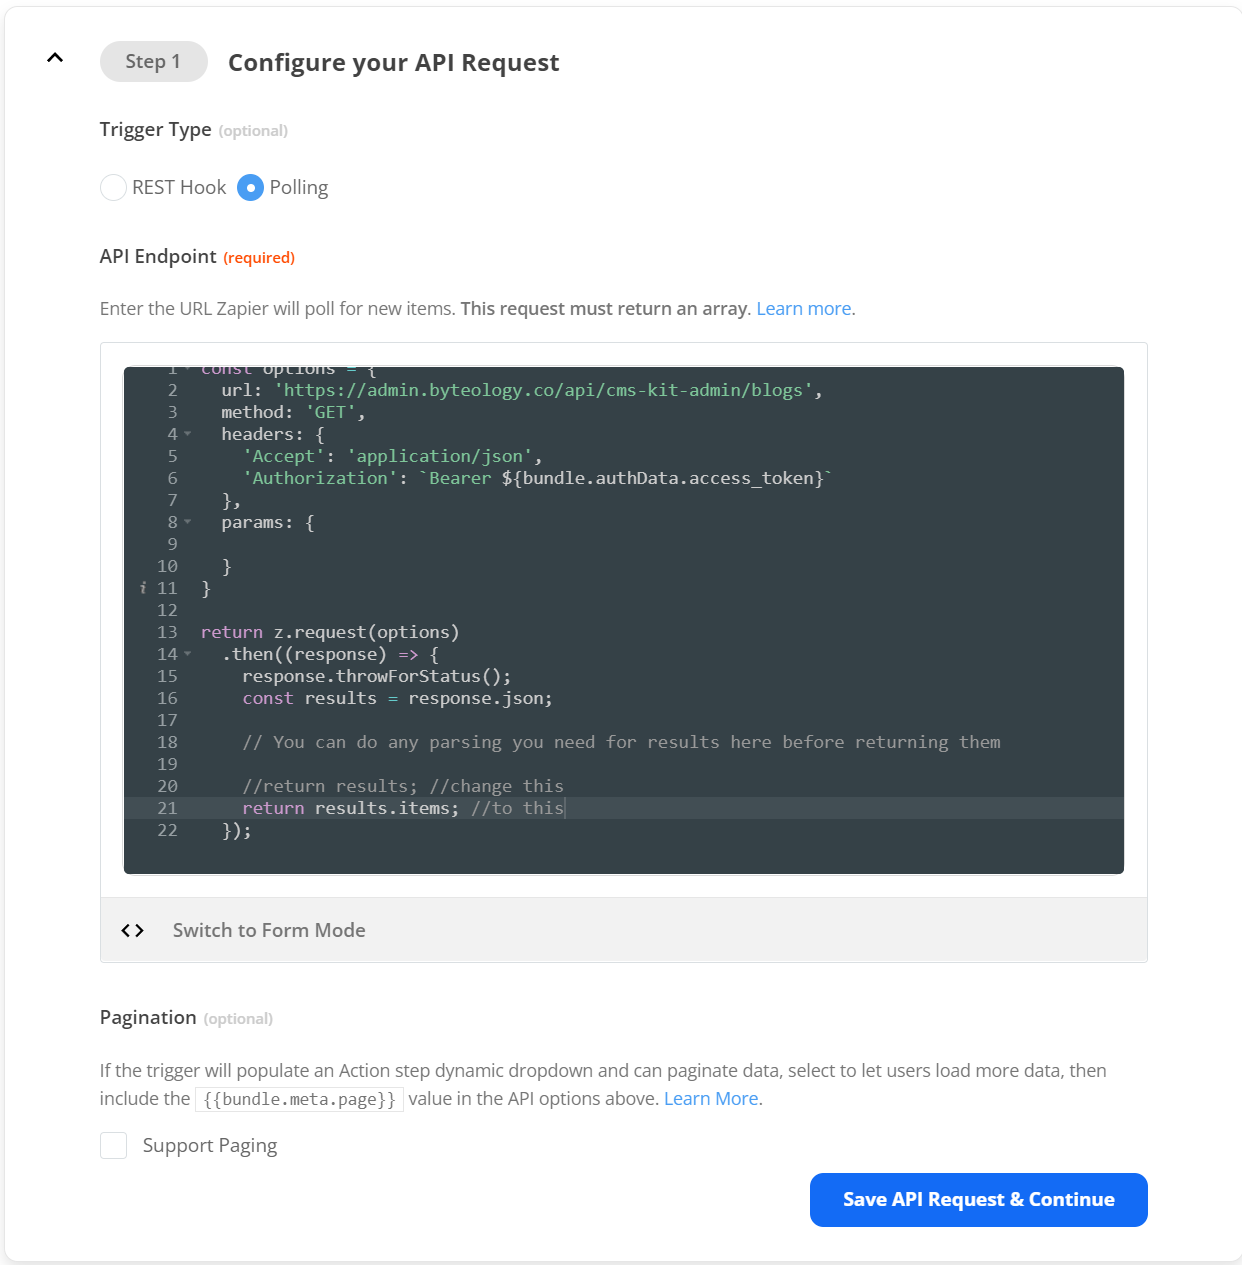
Enter into the “API Endpoint” box the URL for your blogs endpoint, typically something like: https://{backend.domain}/api/cms-kit-admin/blogs. If you plan on hosting more than 10 blogs, you might want to expand the “Options” section and add the MaxResultCount parameter.
Once your input is all set, click on the “Switch to Code Mode” button to change over. Once converted, modify the return line so that it returns results.items as opposed to just results. When finished, press the “Save API Request & Continue” button and move onto testing.
Test your API Request
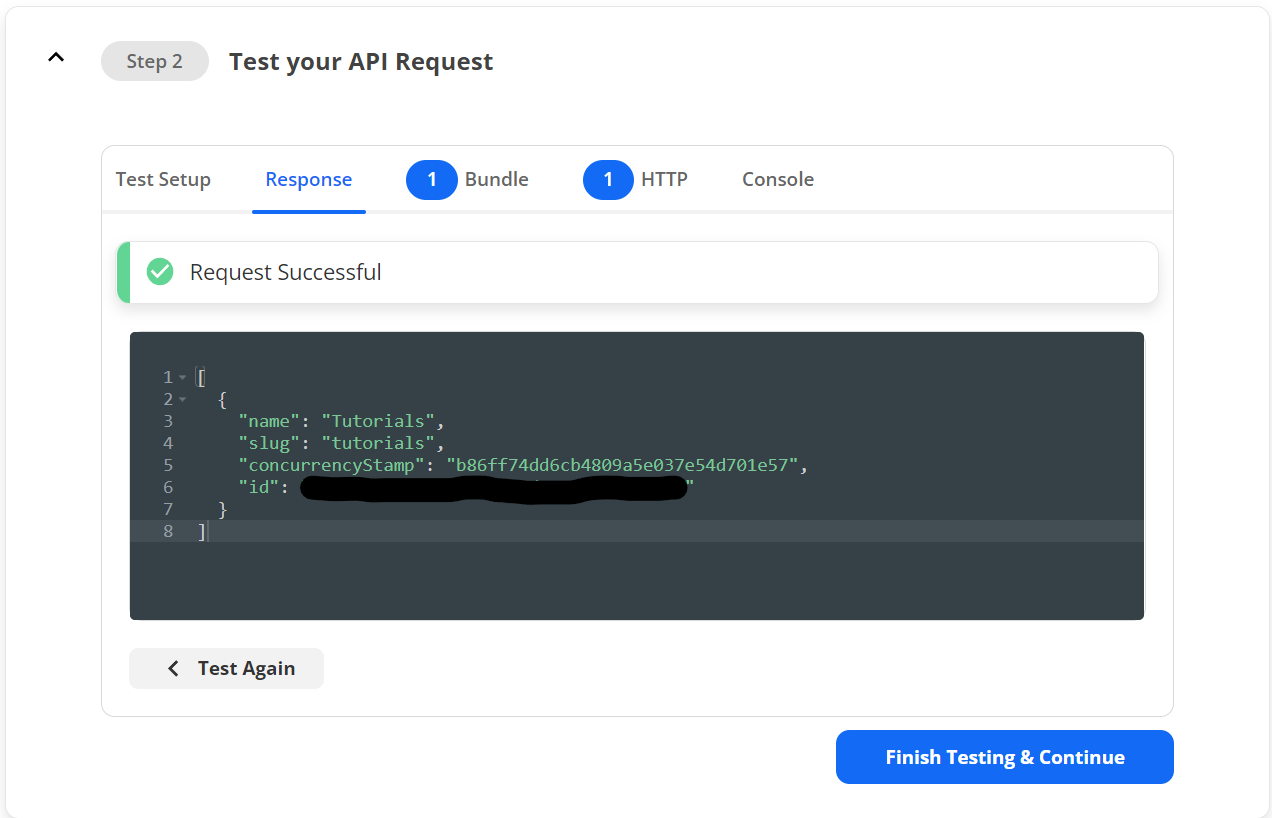
On the “Test your API Request” tab, select a valid Account and click the “Test Your Request”. It should be successful and return a list of blogs in your system.
Note: Write down the slug returned on the test here so we can use that to test the next trigger later.
Define your Output
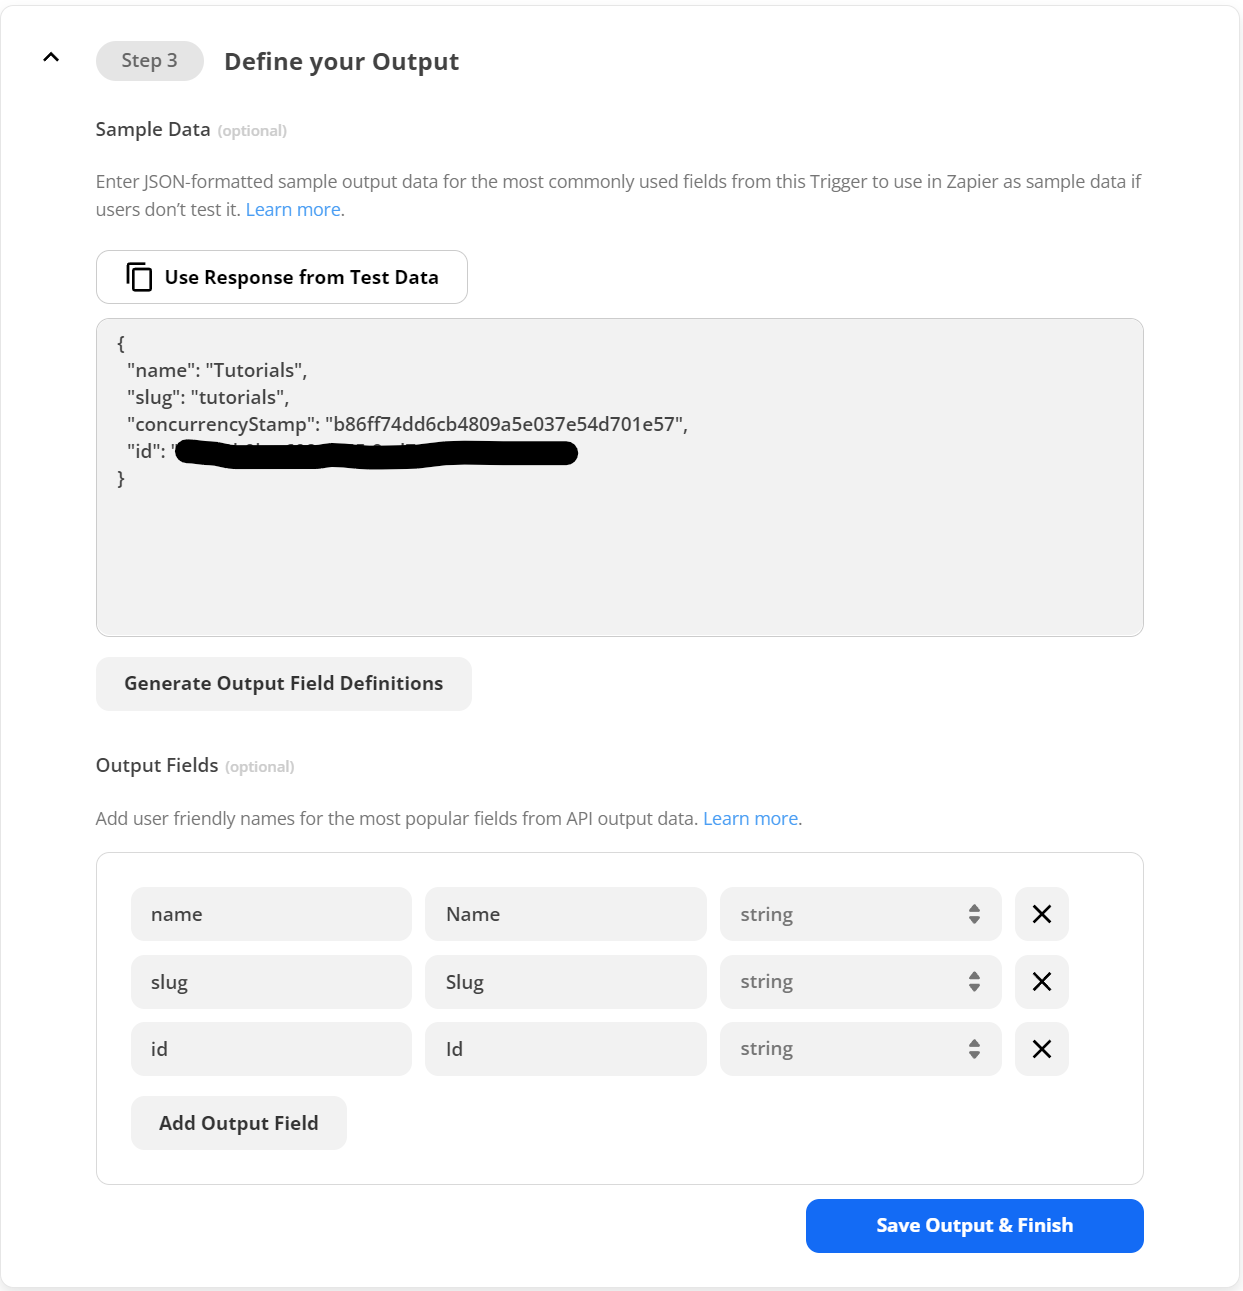
On the “Define your Output” tab, click on the “Use Response from Test Data” button, then click on the “Generate Output Field Definitions” button. Clean up the input however you need and then press the “Save Output & Finish” button.
New Blog Posts trigger
Navigate back to the “Triggers” section and add a new trigger. This time we are defining a trigger that will get the blog posts for a specific blog specified by the user’s input choices.
Settings
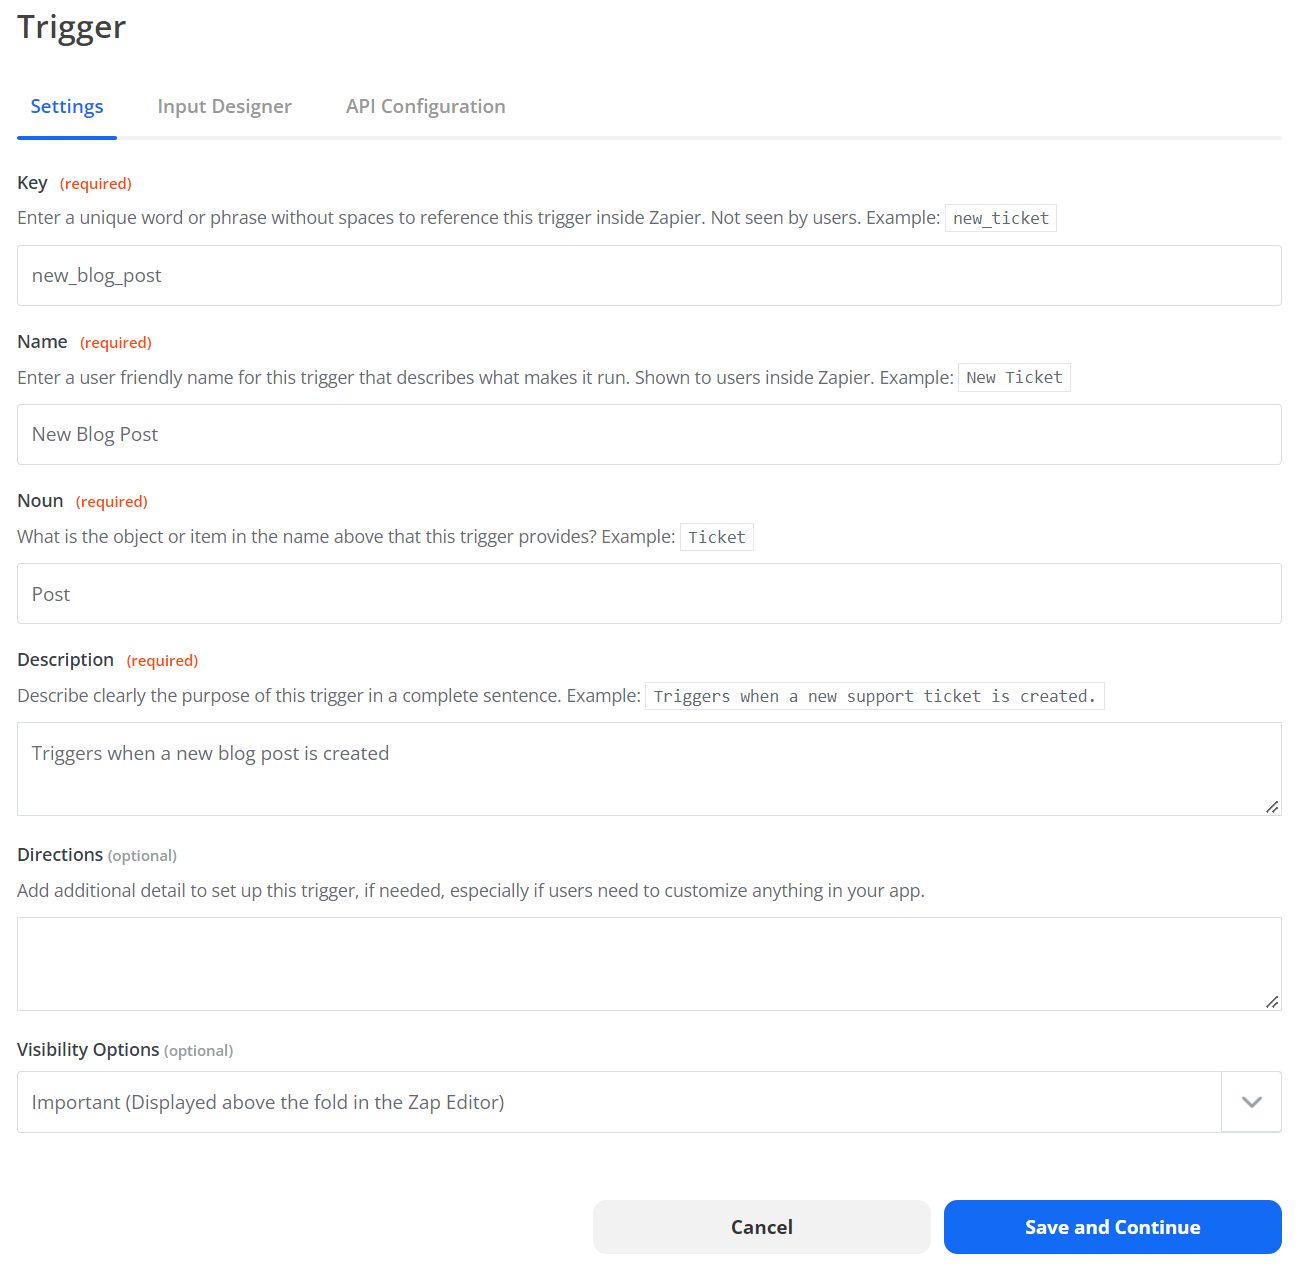
Same deal here, fill out the form in the standard way and press the “Save and Continue” button. The input I used was:
- Key: new_blog_post
- Name: New Blog Post
- Noun: Post
- Description: Triggers when a new blog post is created
Input Designer
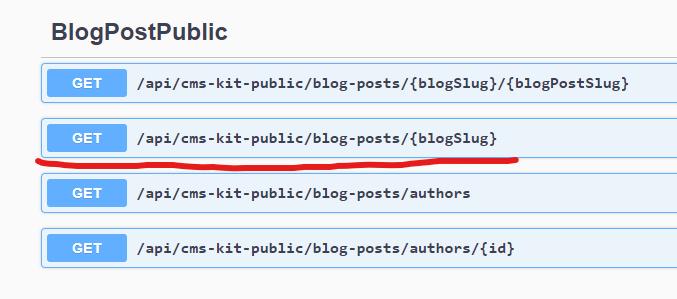
Instead of leaving this defaulted, we need to know which blog slug to look at for new posts. There are a FEW was to do this via the API, but we are going to use the BlogPostPublic endpoint defined in the Swagger:
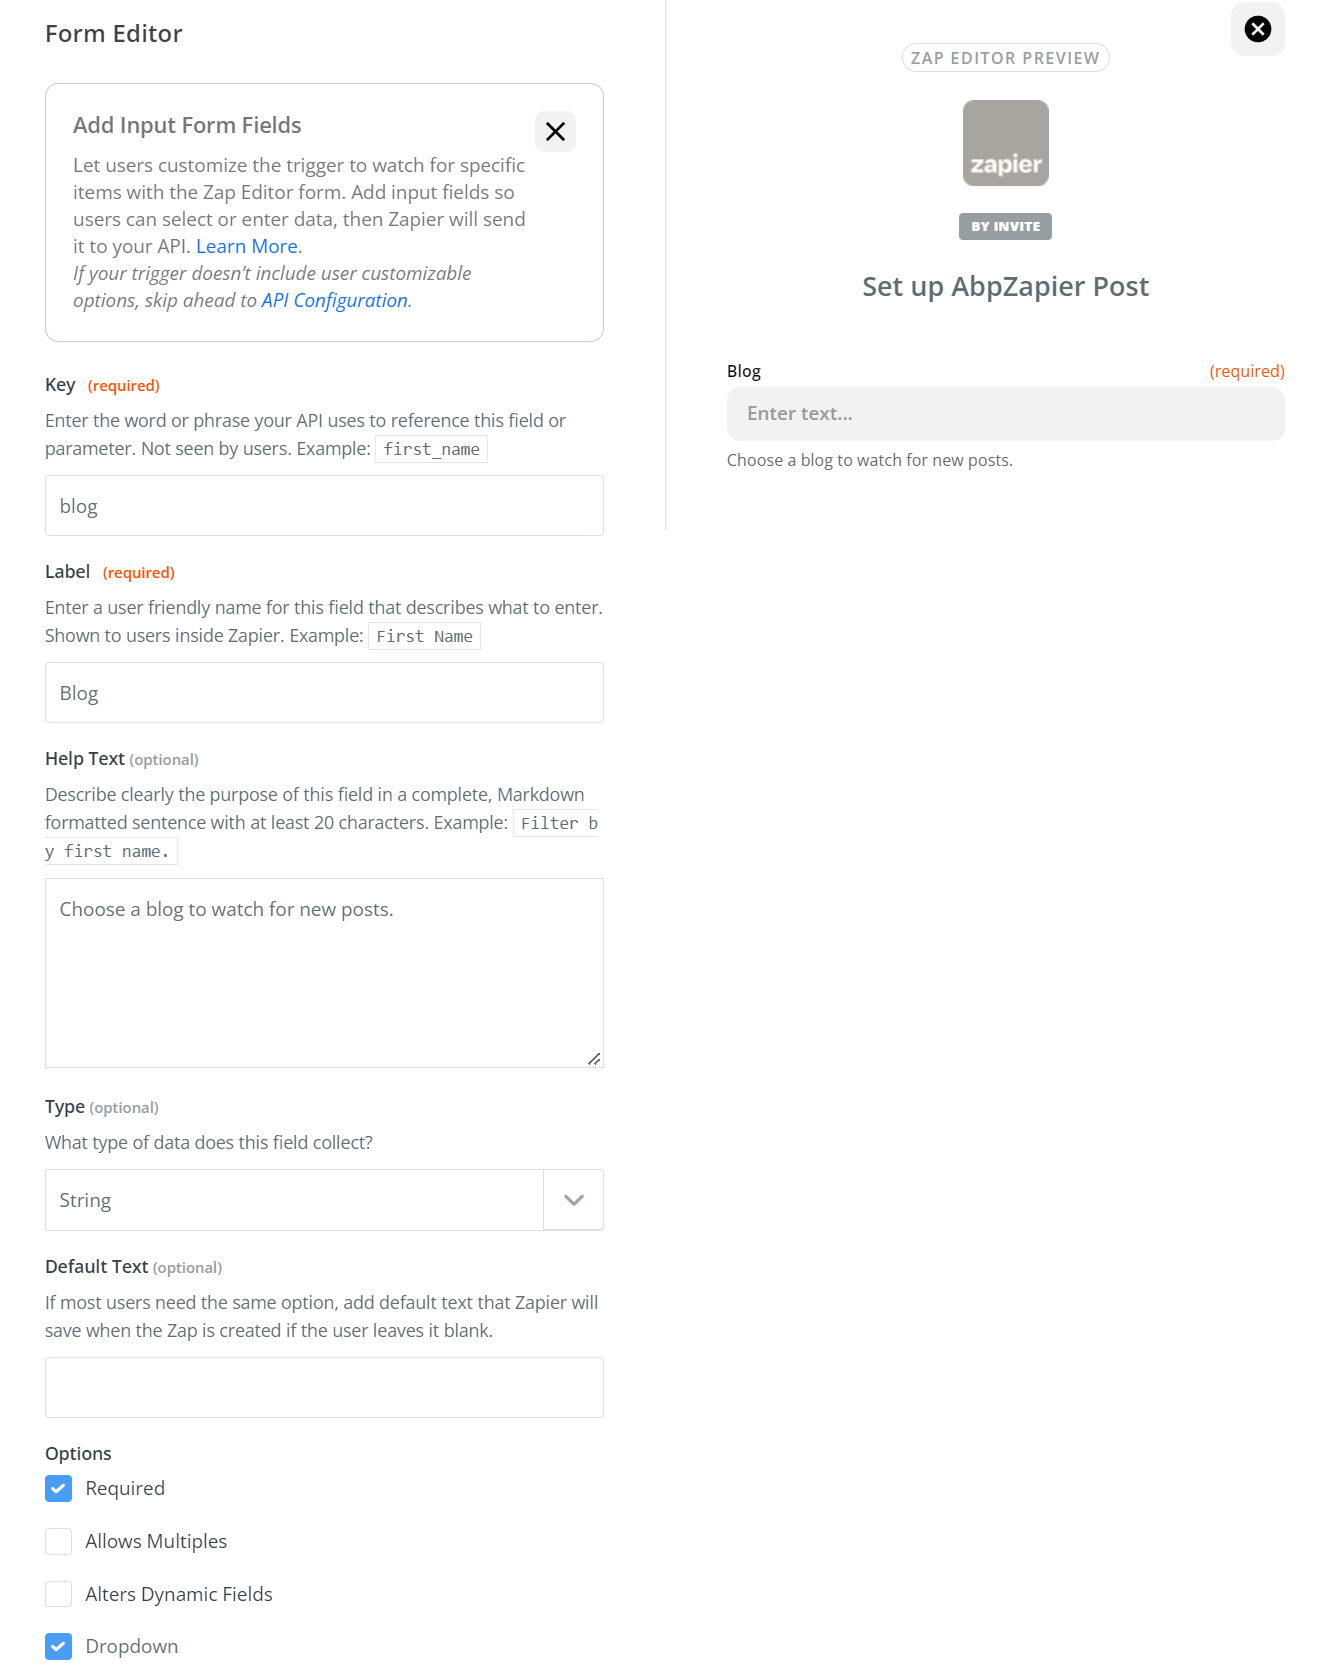
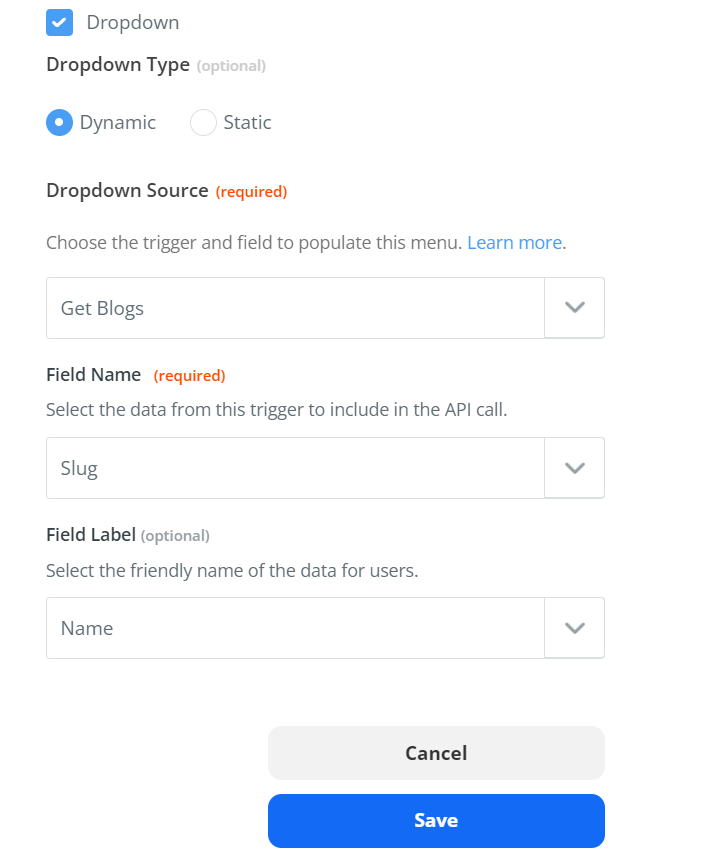
Click on the “Add User Input Field” button to load the input form. Fill it out in a similar style to what you did on the new trigger forms, but make sure to check the “Required” and “Dropdown” check boxes. We’ll go over those in a second.
The data I used in the top form was:
- Key: blog
- Label: Blog
- Help Test: Choose a blog to watch for new posts.
- Type: String
In the dropdown definition section below, choose the “Dynamic” radio button. In the new “Dropdown Source” dropdown that appears, choose the “Get Blogs” trigger, then select the “Slug” field as the “ID” and the “Name” field as the Field Label.
Press the “Save” button and move onto the API Configuration tab.
API Configuration
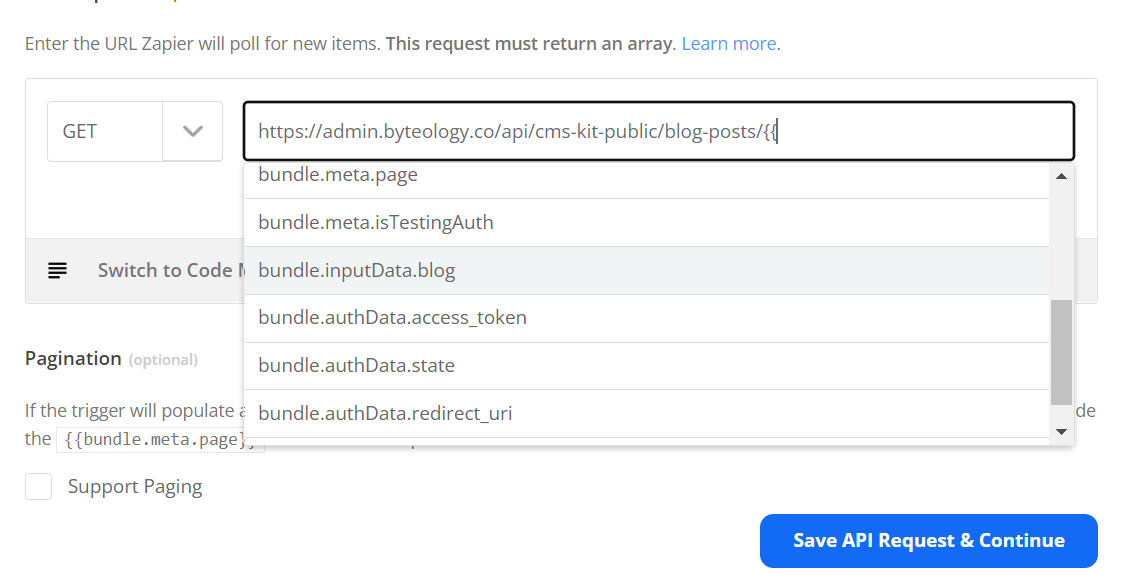
In the “API Endpoint” box, type the URL for your API endpoint and replace the {blogSlug} variable shown in swagger with the Zapier variable from the input designer. If you start typing “{{“ in your field anywhere, Zapier will list the available variables you can use to make your system more dynamic:
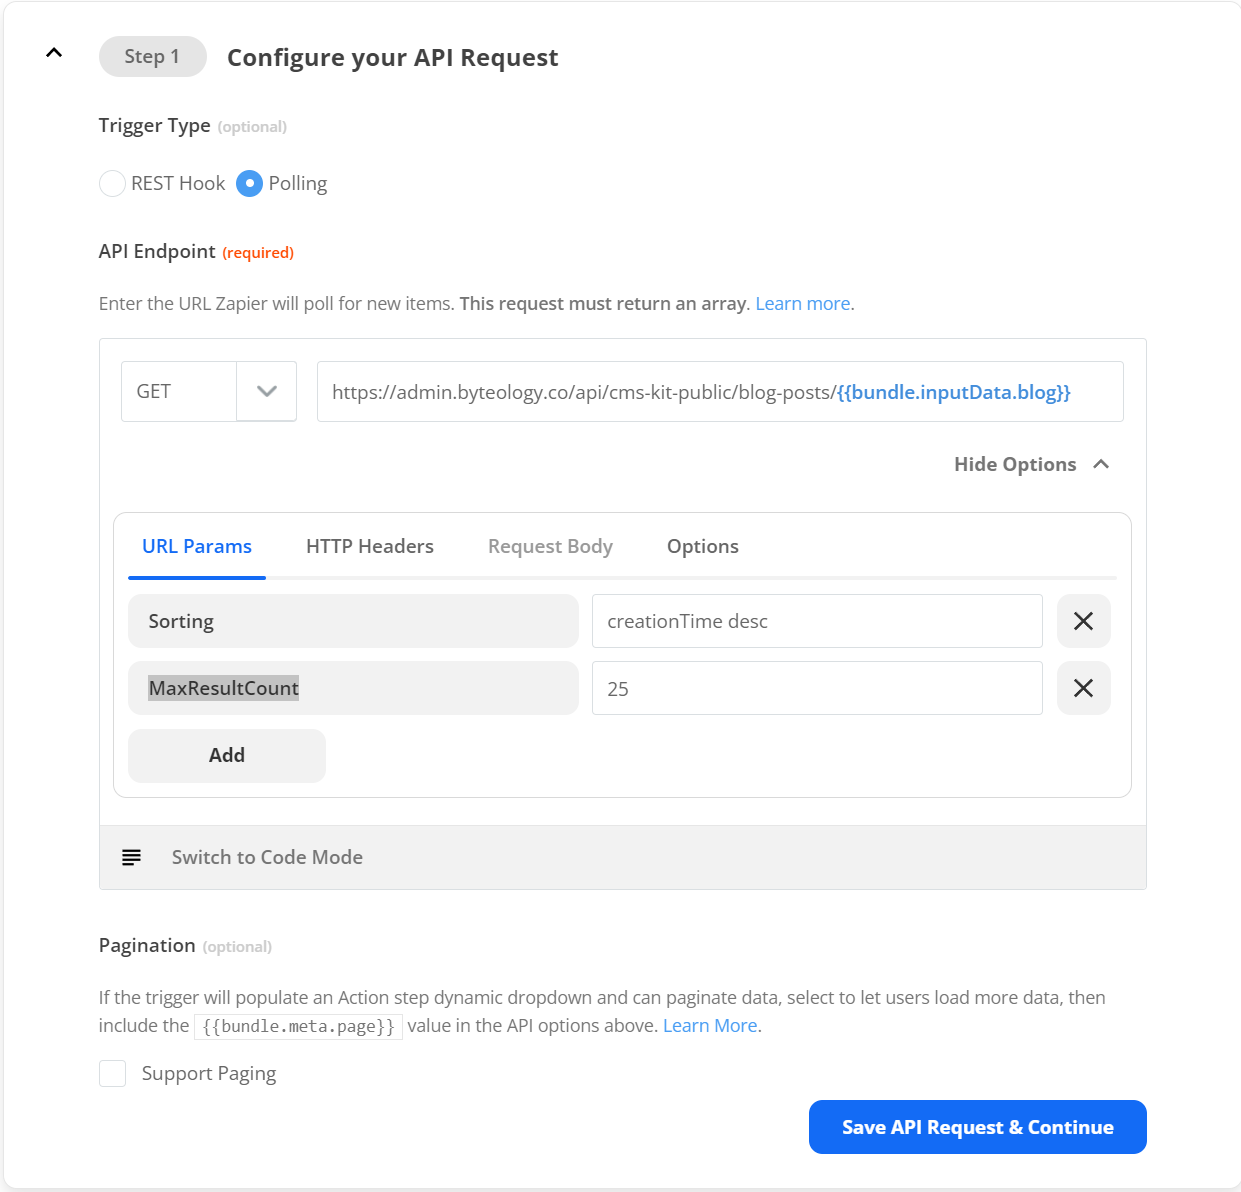
The variable we are specifically looking for is the bundle.inputData.blog (or whatever you set your Key value to on the input designer), so your final should look something like this: https://admin.byteology.co/api/cms-kit-public/blog-posts/{{bundle.inputData.blog}}.
Next, Expand the “Options” list. Remove the element that was automatically added called “blog” and two new ones:
- Key: Sorting, Value:
creationTime desc - Key: MaxResultCount, Value:
25
These will return the newest 25 blog posts for that blog in each request, so you shouldn’t have to worry about paging. Adjust the MaxResultsCount value to fit your needs but remember that the Zap is going to fire ever few minutes so you should be fine with 25 in most situations.
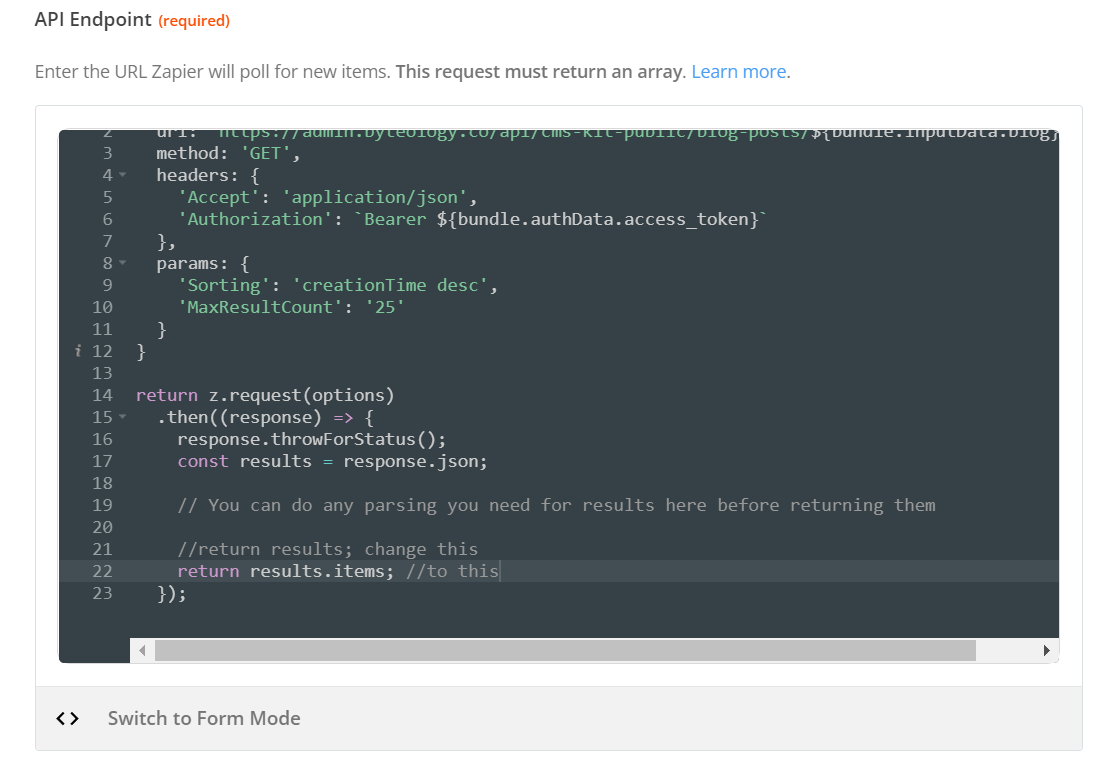
Once you have all of that in, press the “Switch to Code Mode” button to covert into the javascript and change the return value to return the results.items again. Double check that the params section has the correct values, otherwise the request will fail.
When you are satisfied, press the “Save API Request & Continue” button and advance to testing.
Test your API Request
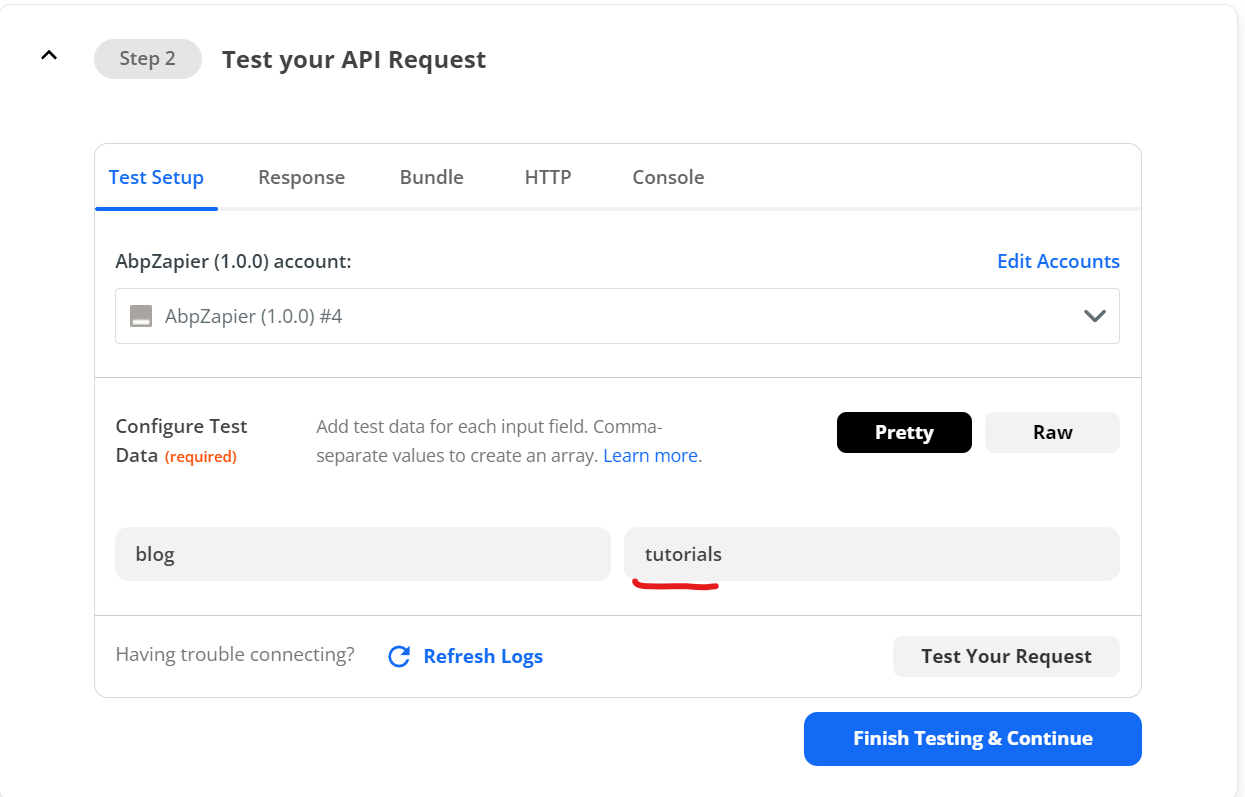
In the “Test your API Request” section, choose a valid account option and change the test value at the bottom to match a valid slug (I asked you to remember this when we created the “Get Blogs” trigger). If you can’t remember, the CMSKit admin page has the slug values on the “Blogs” tab, so go grab one quick and put it in the textbox.
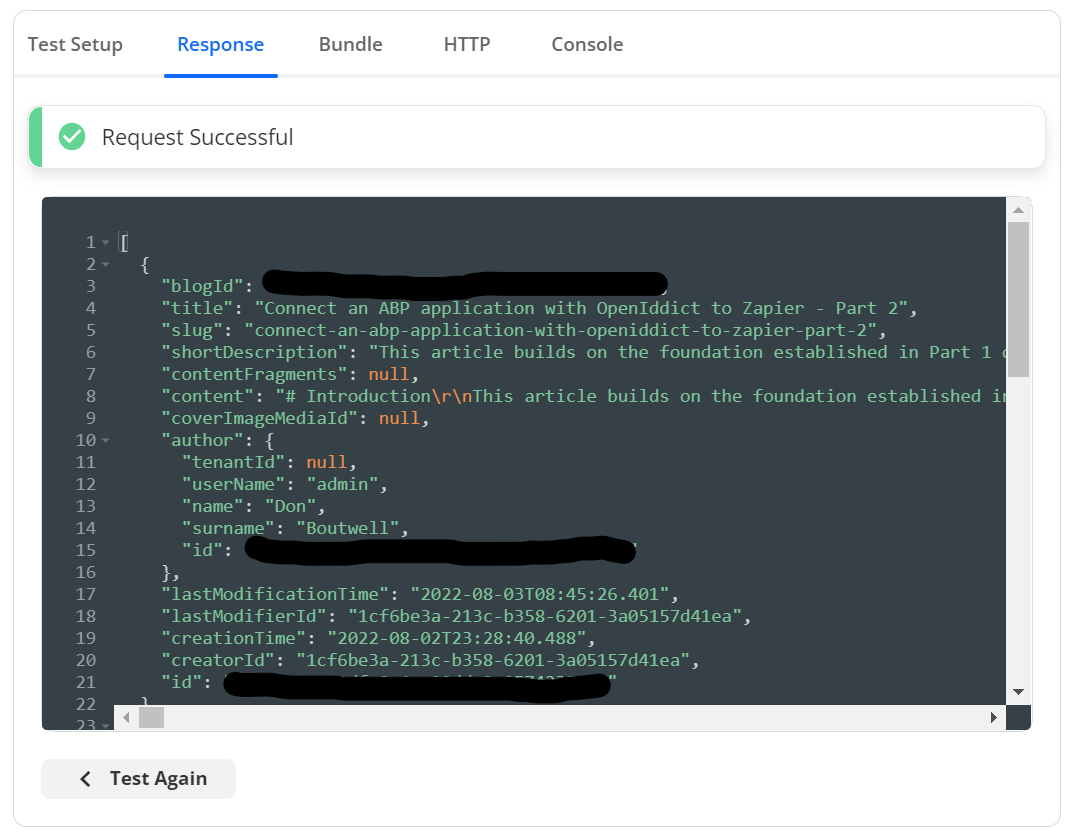
Once you are ready, fire off the “Test your Request” button and confirm you have a valid configuration. Once you test successfully, click on the “Finish Testing & Continue” button and move on to the “Define your Output” section.
Define your Output
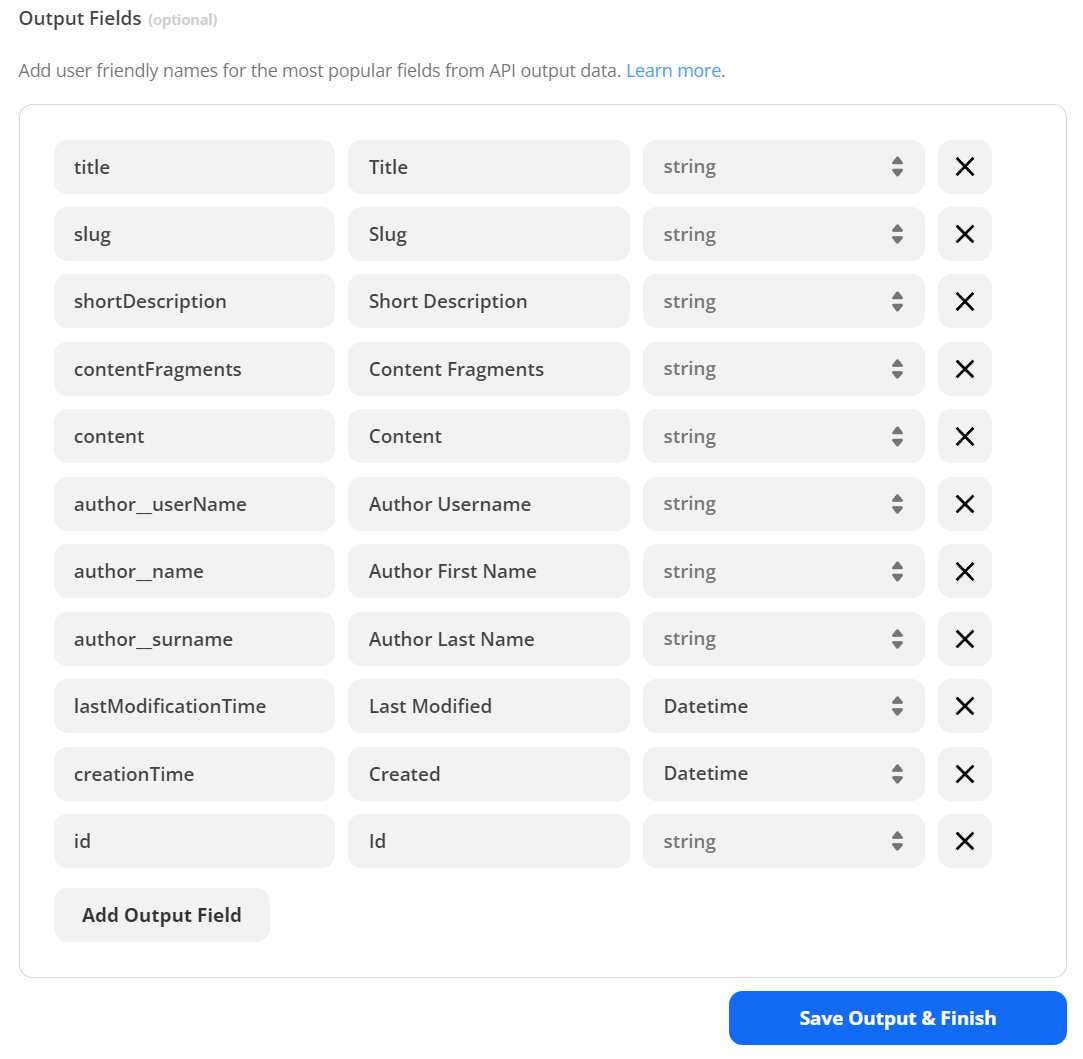
As with last time, press the “Use Response from Test Data” button followed by the “Generate Output Field Definitions” button to quickly populate the output fields. Clean up the fields as you see fit but keep the majority of the fields so we can use them in Zaps later. I just removed the various ID fields since we won’t be using them in our Zap today.
Once you are satisfied with this, click on the “Save Output & Finish” and we can move on to create a zap!
Creating a Zap to update your socials when a new blog post is created
Navigate to the Zapier app dashboard. Once there, click on the “+ Create Zap” button to start creating your new Zap.
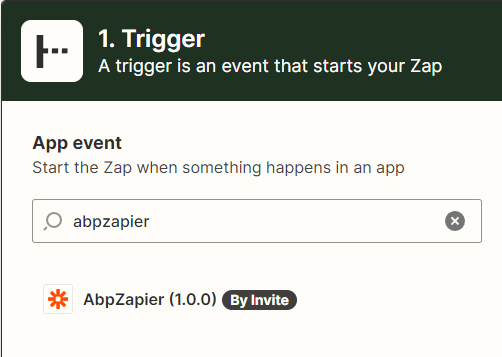
In the Trigger stage, search for your integration and click on it
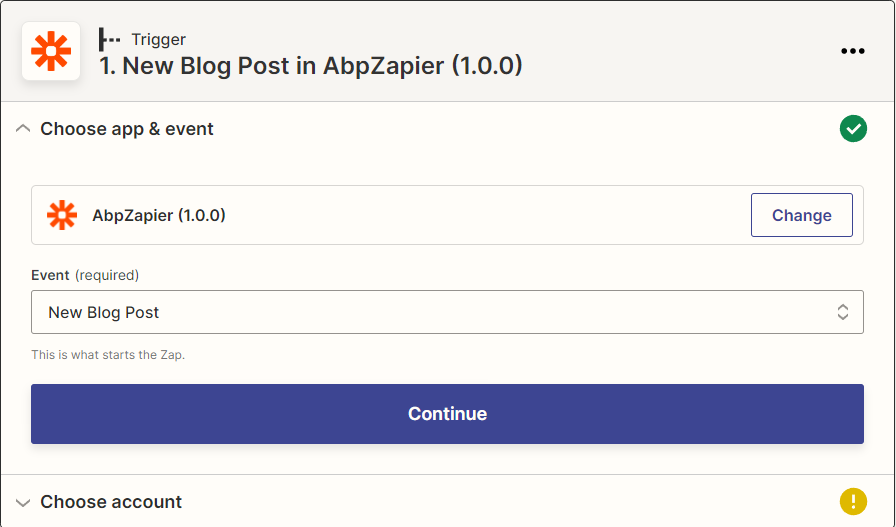
Choose the “New Blog Post” event, and press “Continue”
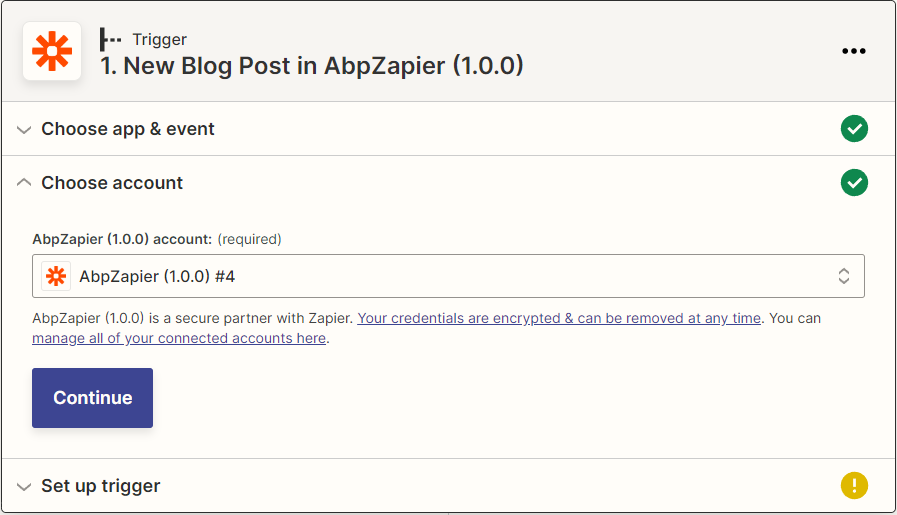
Choose a valid account and press “Continue”
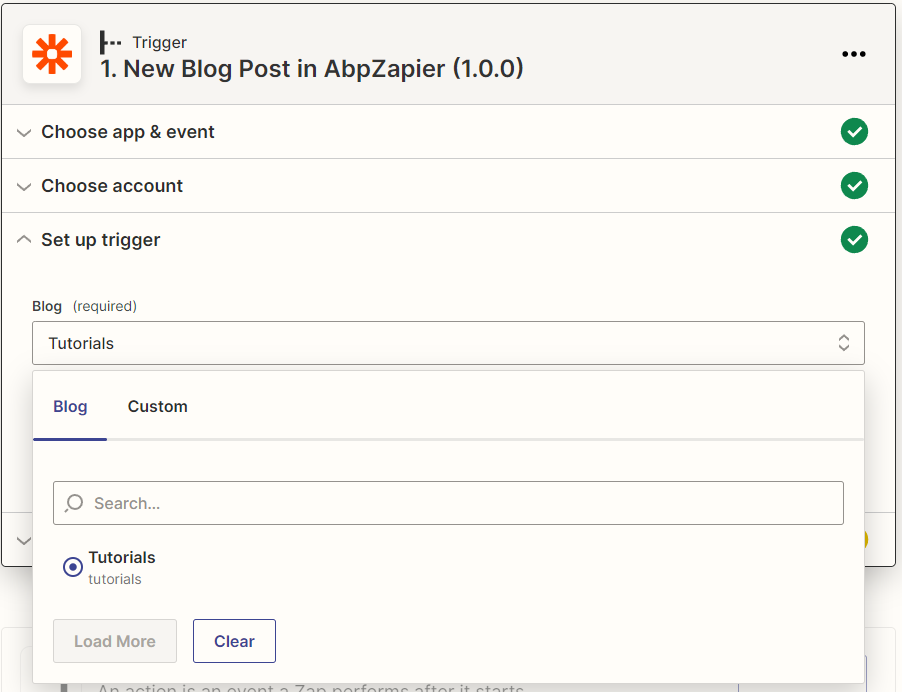
Choose the blog that you are watching from the dropdown menu. If this doesn't work, you will need to go back and test your “Get Blogs” trigger to find out why. Most of the time I encounter issues with this step it is because the authorization code has become invalid (they last 5 minutes by default) so I just have to go back over and create a new one.
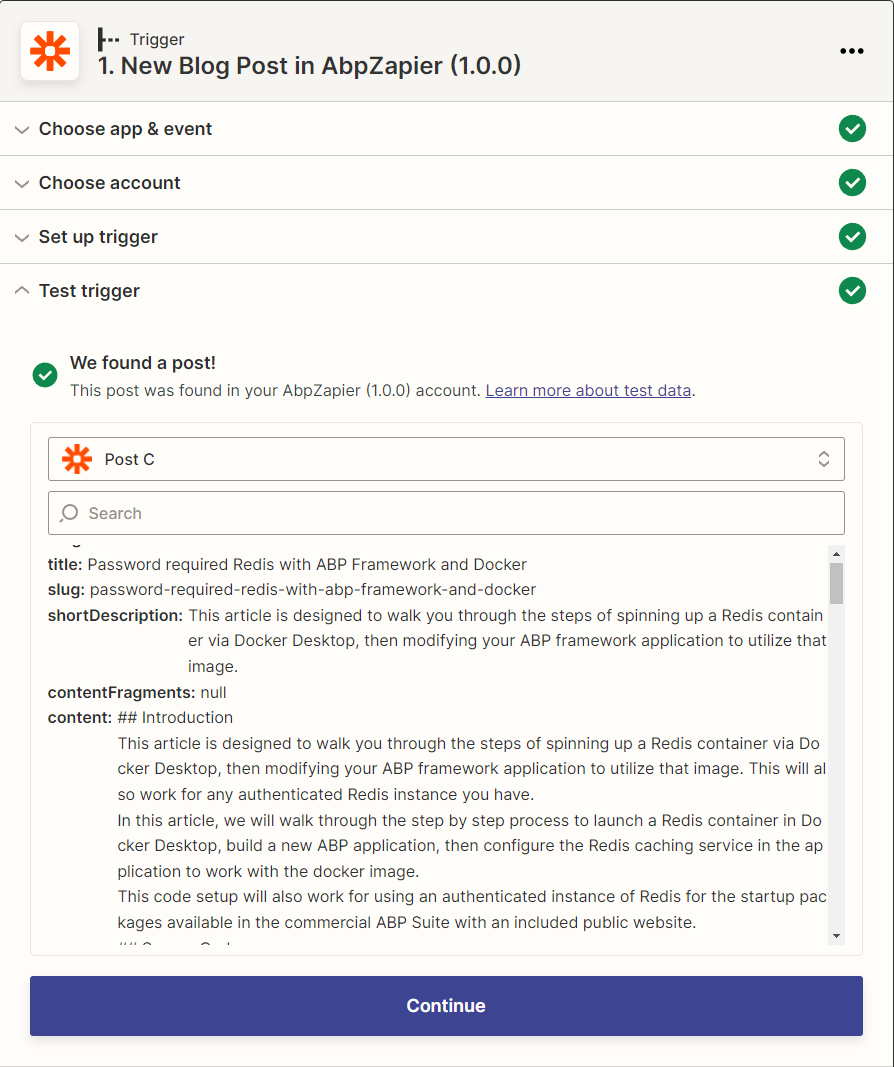
Press “Continue” and then “Test your trigger”. Hopefully all is well and you see the “We found a post” dialog.
Press “Continue” to move onto the Action stage of the Zap.
Action Stage – Format
With this article, I am going to configure the Zap to post a link to Twitter for each blog post I create. Twitter has a character limit on posts, so in order to account for that we need to format our string to the 280 character limit with a “Format” action.
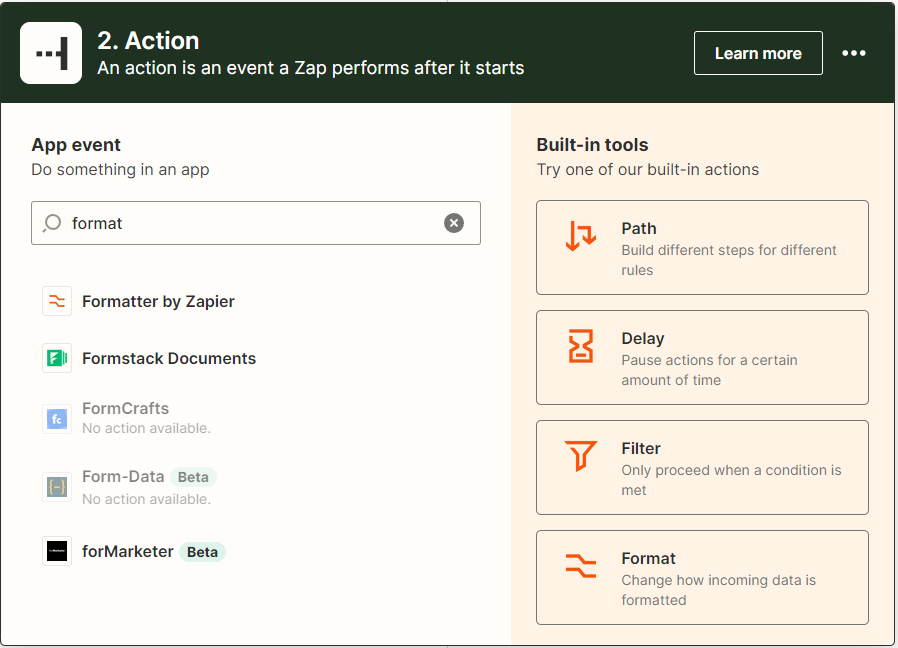
Search for “Formatter” or click on the “Format” button in the built-in tools section if it’s available
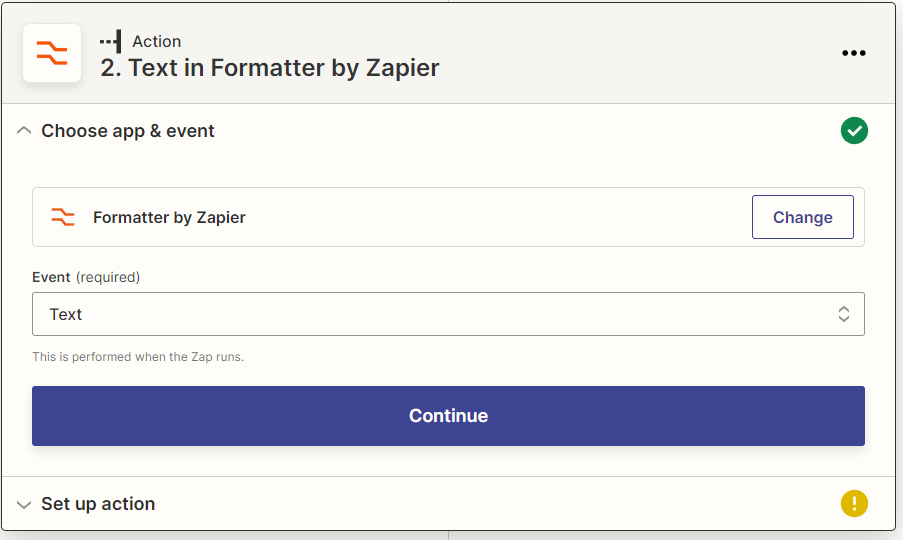
Choose the “Text” event and press “Continue”
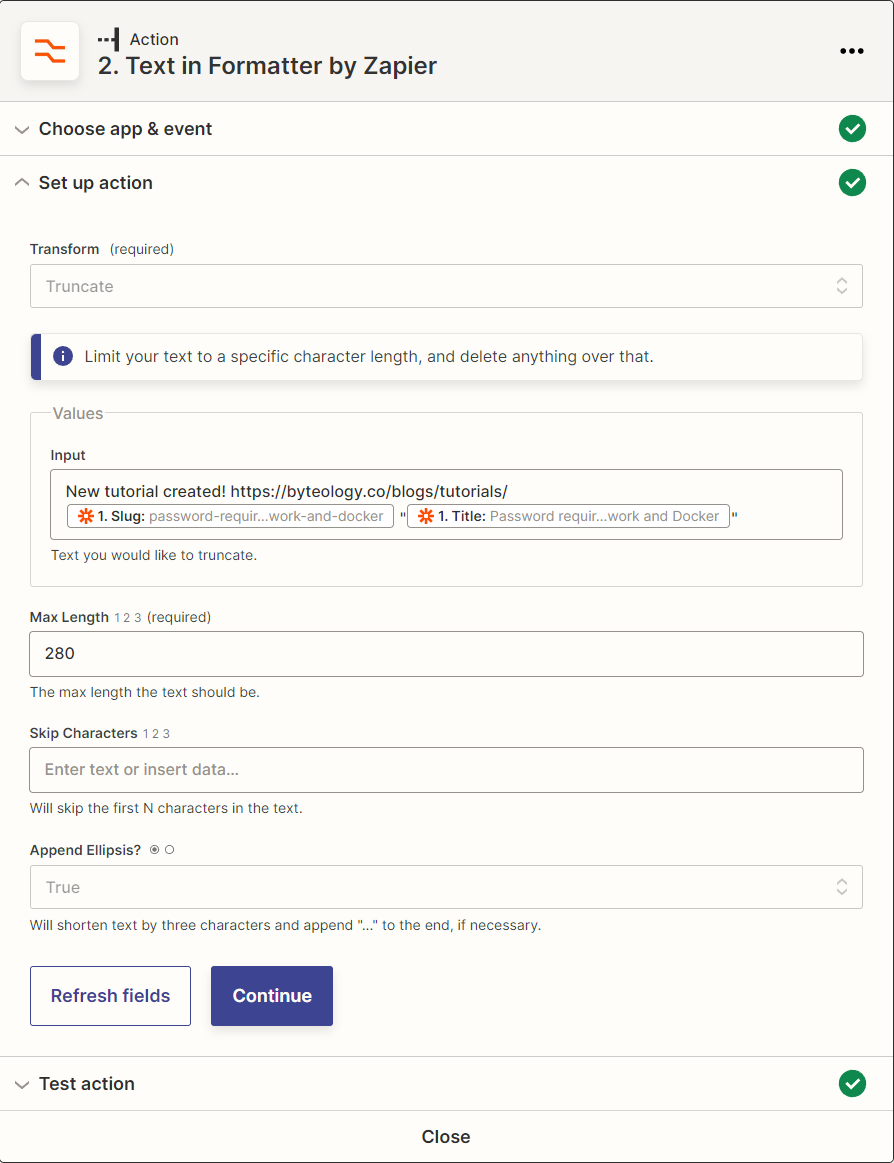
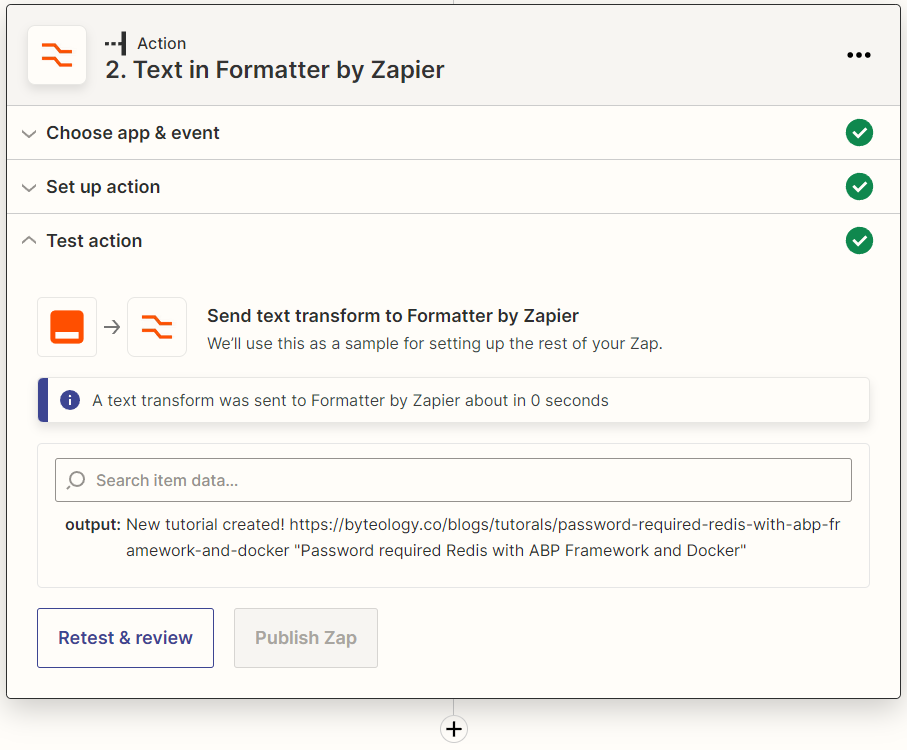
In the “Set up action” section, choose the “Truncate” transform option, then create the text you want to see in your tweet in the Input box, drawing from the trigger step. Once you have that, set the “Max Length” field to 280 and set the “Append Ellipsis” option to your preference. When all is said and done, your input should look something like this:
When you are satisfied with the setup, press “Continue” to move to testing. Press the “Test & continue” button and move onto the next action stage.
Action Stage – Twitter
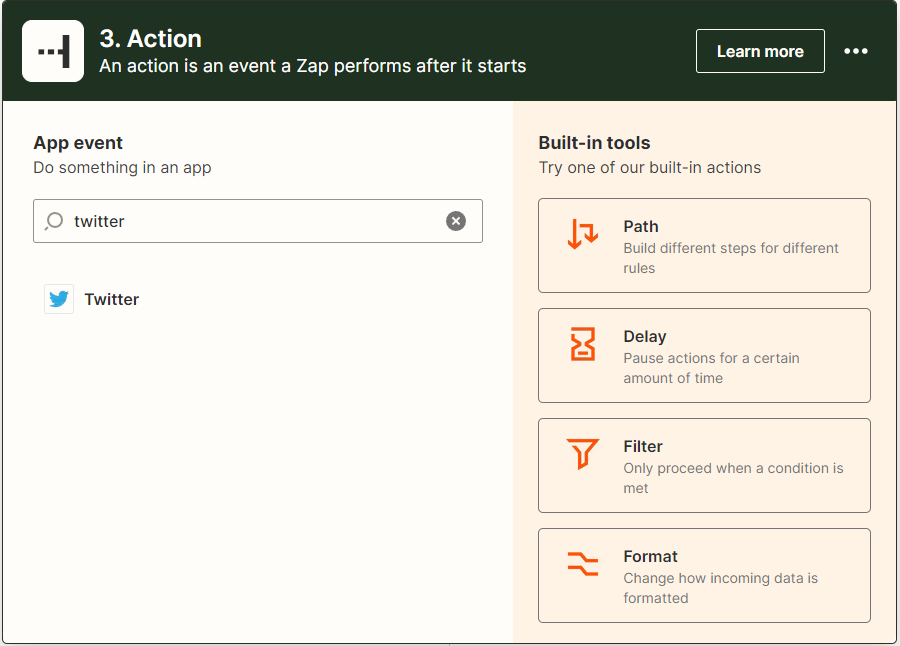
Hit the little circle plus button under your formatter action to create a new action. Search for and add “Twitter” as your action on this step.
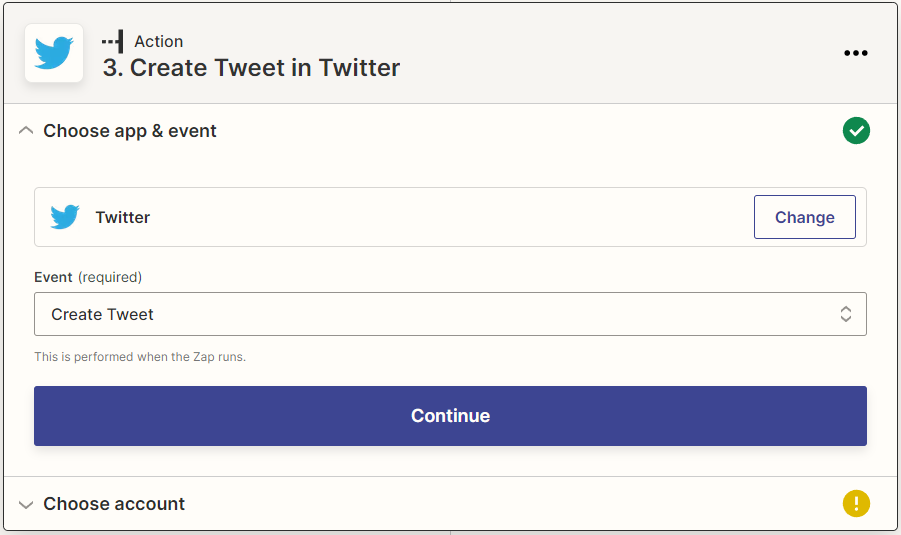
For the event, choose “Create Tweet”, then press “Continue”
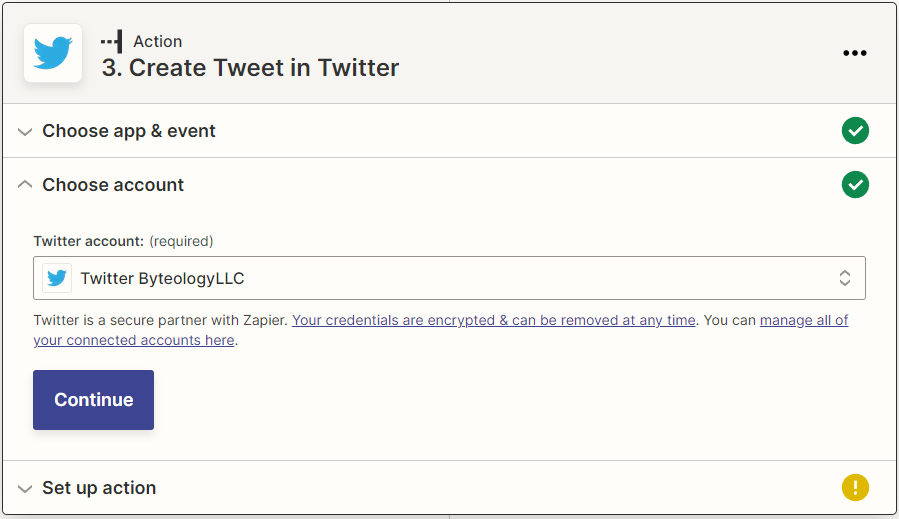
Choose or create an account to connect Zapier to your twitter, then press “Continue”
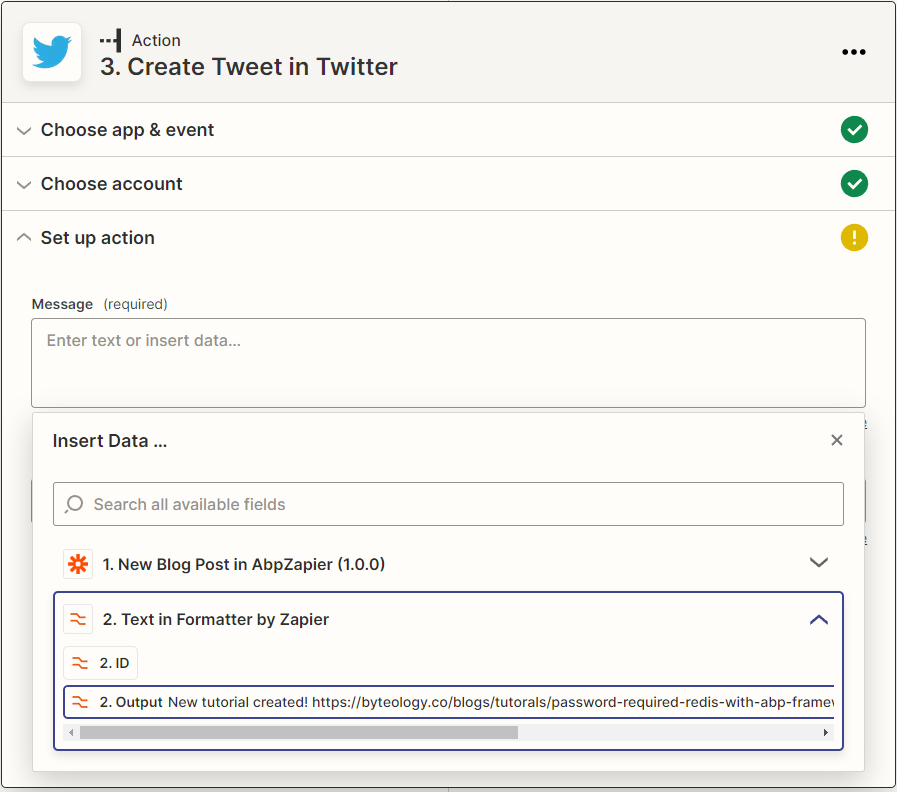
On the “Set up action” section, for your “Message” text you want to choose the OUTPUT from the formatter action earlier in the process
If you have any media you want to attach, you can set it to do so here. Then choose whether or not to shorten the URLs. When all is said and done, hit “Continue” to advance to the testing stage.
On the “Test action” section, click on the “Test & review” button to fire a test tweet out. Review the tweet on Twitter and ensure everything looks correct, especially testing any links you may have if they have been shortened. If no changes need to be made return to Zapier and press the “Publish Zap” button to complete the Zap.
Conclusion
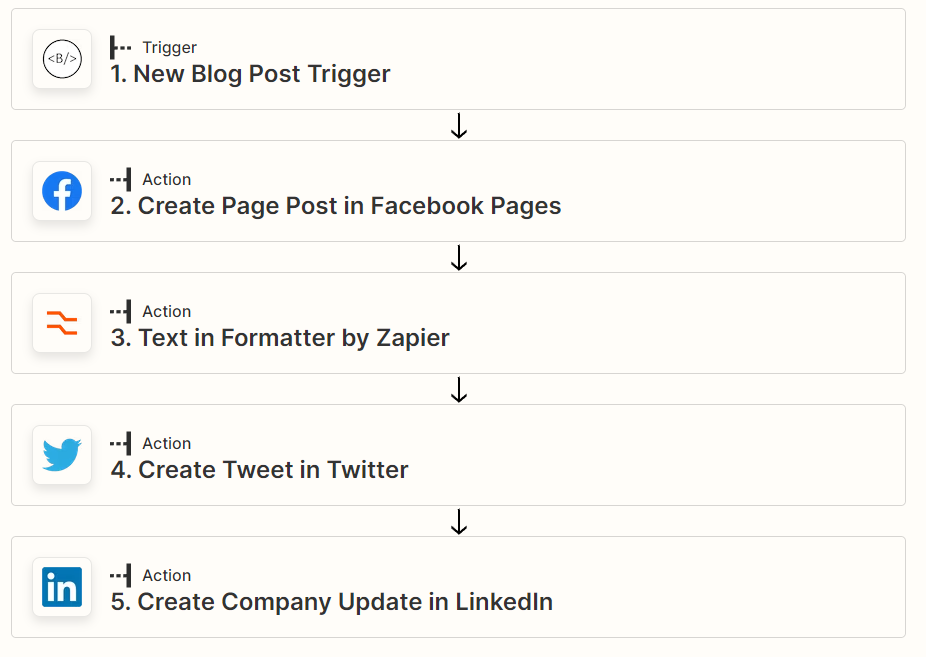
Zapier is an incredibly useful and powerful platform that can be extended and customized to meet essentially any needs you have. For example, my production Zap for this exact situation has 4 action phases and posts a similar link on each and every one of my various social platforms:
I encourage everyone to take time to learn both the ABP Framework and the Zapier platform to make their jobs and lives easier.
Last Modification : 8/4/2022 7:03:40 PM
